Making your own necklace is a small cheat code
Walk into any shop and the handcrafted ones always cost more, as if the “made by a human” label justifies the markup. But most of these designs are simpler than they look, and the whole difference between something that looks handmade and something that looks homemade usually comes down to a few tiny techniques that nobody bothers to explain.
The good news: you don’t need a workshop. Almost every project below uses the same handful of tools, and by the end you’ll know why each step matters — not just what to do — so the next one you make gets easier.
The one skill that fixes most mistakes
Before we get to any of these, learn jump rings, because you’ll use them in nearly every project and most people do them wrong from day one. A jump ring is just a small metal loop — think of it as a tiny carabiner connecting your clasp to your necklace.
The mistake: pulling the two ends apart like you’re opening a paperclip. That stretches the ring, and it never closes back square, so your clasp dangles loose and eventually falls off. Instead, hold the ring with two pairs of pliers and twist the ends apart — one hand pushes toward you, the other away, along the plane of the ring. It opens like a little door. To close, reverse it: twist back until the ends meet flush. Open and close along the twist, never the pull, and your connections stay tight for years.
Handmade original lace necklace
Lace over a necklace is one of those tricks that looks delicate and fancy but is basically just fabric and a needle. You’re really making a soft lace “strap” and turning it into something you wear.
Materials:
- Lace fabric of your choice
- Scissors
- Needle and thread
- Small beads, crystals, or charms
- Jewelry findings (jump rings, lobster clasp)
- Pliers
Steps:
- Decide the design and length. Measure around your neck and add a few inches for the clasp and overlap, then cut the lace. Choker? Keep it snug. Pendant length? Go longer.
- Lay the lace flat and decide where your beads or charms go. Mark each spot with a pin.
- Thread your needle and tie a knot at the end. From the back (wrong) side, bring the needle up through a marked spot, slide on your bead or charm, then push the needle back down through the same hole. Pull gently to seat it. Doing it this way — up and down through one hole — locks the bead without a visible knot on top.
- Repeat for all your spots. Pattern them or scatter them; both work.
- Now make it a strap. Fold the lace in half lengthwise with the good (right) side facing in and the wrong sides out. Line up the long edges and sew them together with a running or blanket stitch, leaving a few inches open at one end. That opening is how you’ll turn it right side out later.
- Reach through the opening and flip the whole thing right side out, poking out the seams and curves so it lies flat.
- Attach the closure. Fold each end of the strap over a jump ring, or thread the jump ring through a folded layer of fabric so it has something to grip, then close it with pliers. Hook the lobster clasp onto one of the jump rings.
- Stitch the opening you left closed, and hide the knot inside the seam.
Handmade necklace made from cork and lace
Cork is a dream material for pendants — it’s light, a needle goes through it easily, and it’s basically free if you save your wine stoppers. The cork is the backbone; the lace is the decoration.
Materials:
- Cork sheet or cork stopper
- Lace trim or fabric lace
- Needle and thread (matching the lace color)
- Scissors
- Jewelry chain or cord
- Jump rings
- Lobster clasp
- Pliers
Steps:
- Choose your pendant shape. Use a pre-cut cork sheet, or trace a shape onto a cork stopper and cut it out with scissors.
- Measure a strip of lace long enough to wrap the front of the pendant, with a little extra to overlap where the two ends meet.
- Lay the cork flat, wrap the lace across the front, and trim it so the ends overlap just enough to sew together.
- Sew the two lace ends together with a running stitch to form a loop, then slide the loop over the cork front and stitch it in place along the back edge so it doesn’t shift.
- Measure the chain or cord around your neck and cut it — for a metal chain, use pliers or wire cutters rather than scissors, which will crush the links. Open the last link with pliers if you need to shorten it.
- Attach jump rings to both ends of the chain, then hook the lobster clasp onto one of them.
- Done. Wear it or gift it — it’s an eco-friendly little piece.
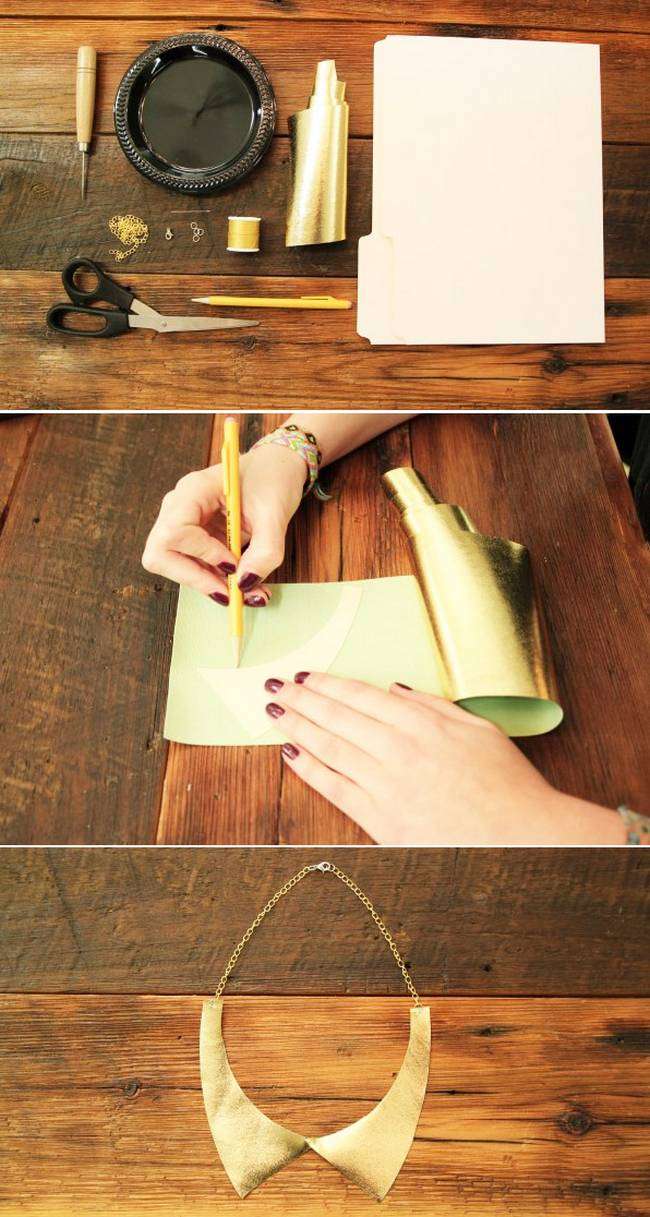
Gold or silver chain connected with fabric
This one’s a neat trick: a plain metal chain gets dressed up by a sleeve of fabric, so you can change the whole look of a cheap chain with a scrap of cloth. The fabric tube just slides over the ends of the chain and holds on with jump rings.
Materials:
- A gold or silver chain of your desired length
- Fabric of your choice
- Needle and thread
- Scissors
- Jewelry findings (jump rings and lobster clasp)
- Pliers
Steps:
- Cut a strip of fabric long enough to wrap around your neck.
- Make a tube: fold the fabric in half lengthwise with the good (right) sides facing each other, and sew along the long edge, leaving both ends open. Folding right sides together hides the raw seam inside when you turn it out.
- Turn the tube right side out through one open end — use a chopstick, crochet hook, or the eraser end of a pencil to poke the fabric out and flatten the seam.
- Slide one end of the fabric tube over the end of your chain, then loop a jump ring through both the fabric and the chain and close it. Repeat on the other end. The fabric now grips the chain instead of sliding around.
- Add the clasp: loop a jump ring through the other end of the chain and the lobster clasp, and close it.
- Trim any fabric poking past the ends for a clean look.
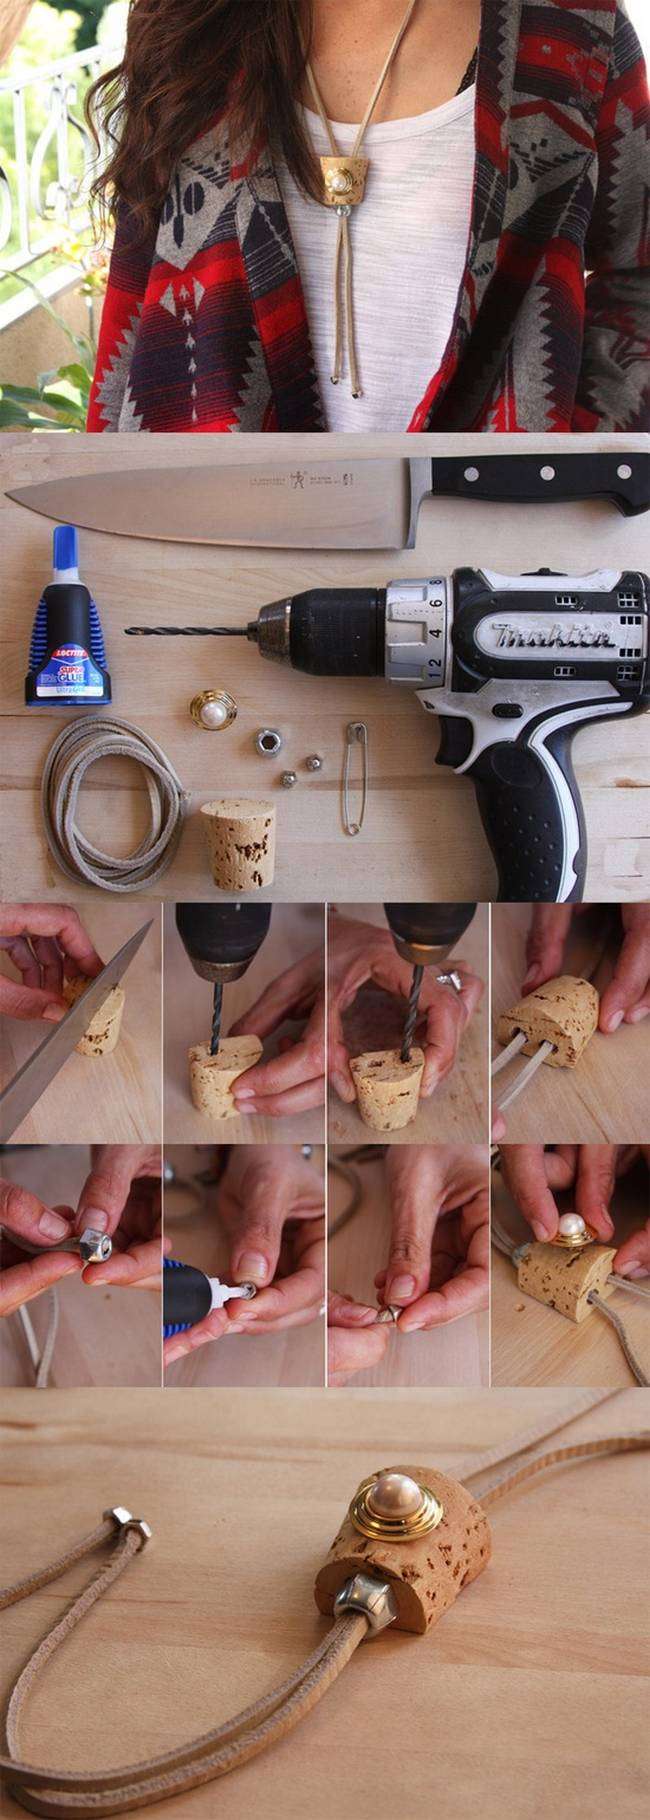
DIY metal necklace
The simplest real necklace you can make is just chain, a clasp, and something to look at. This is the foundational project — get it down and you can make almost anything.
Materials:
- Metal chain
- Metal jump rings
- Metal clasp
- Metal pendant or charm
- Jewelry pliers
- Wire cutters
- Metal file (optional)
Steps:
- Measure the length you want and cut the chain with wire cutters, leaving a little extra at each end for the clasp and jump rings.
- Attach the clasp: open a jump ring (twist, not pull — see above), thread it through one end of the chain and around the clasp, then close it.
- Attach your pendant or charm the same way on the other end.
- Run your finger along the cut ends of the chain. If they’re sharp or rough, smooth them with a metal file so they don’t catch on clothing — a clean finish matters more than you’d think.
- Done. Mix and match chains, pendants, and charms to suit your mood.

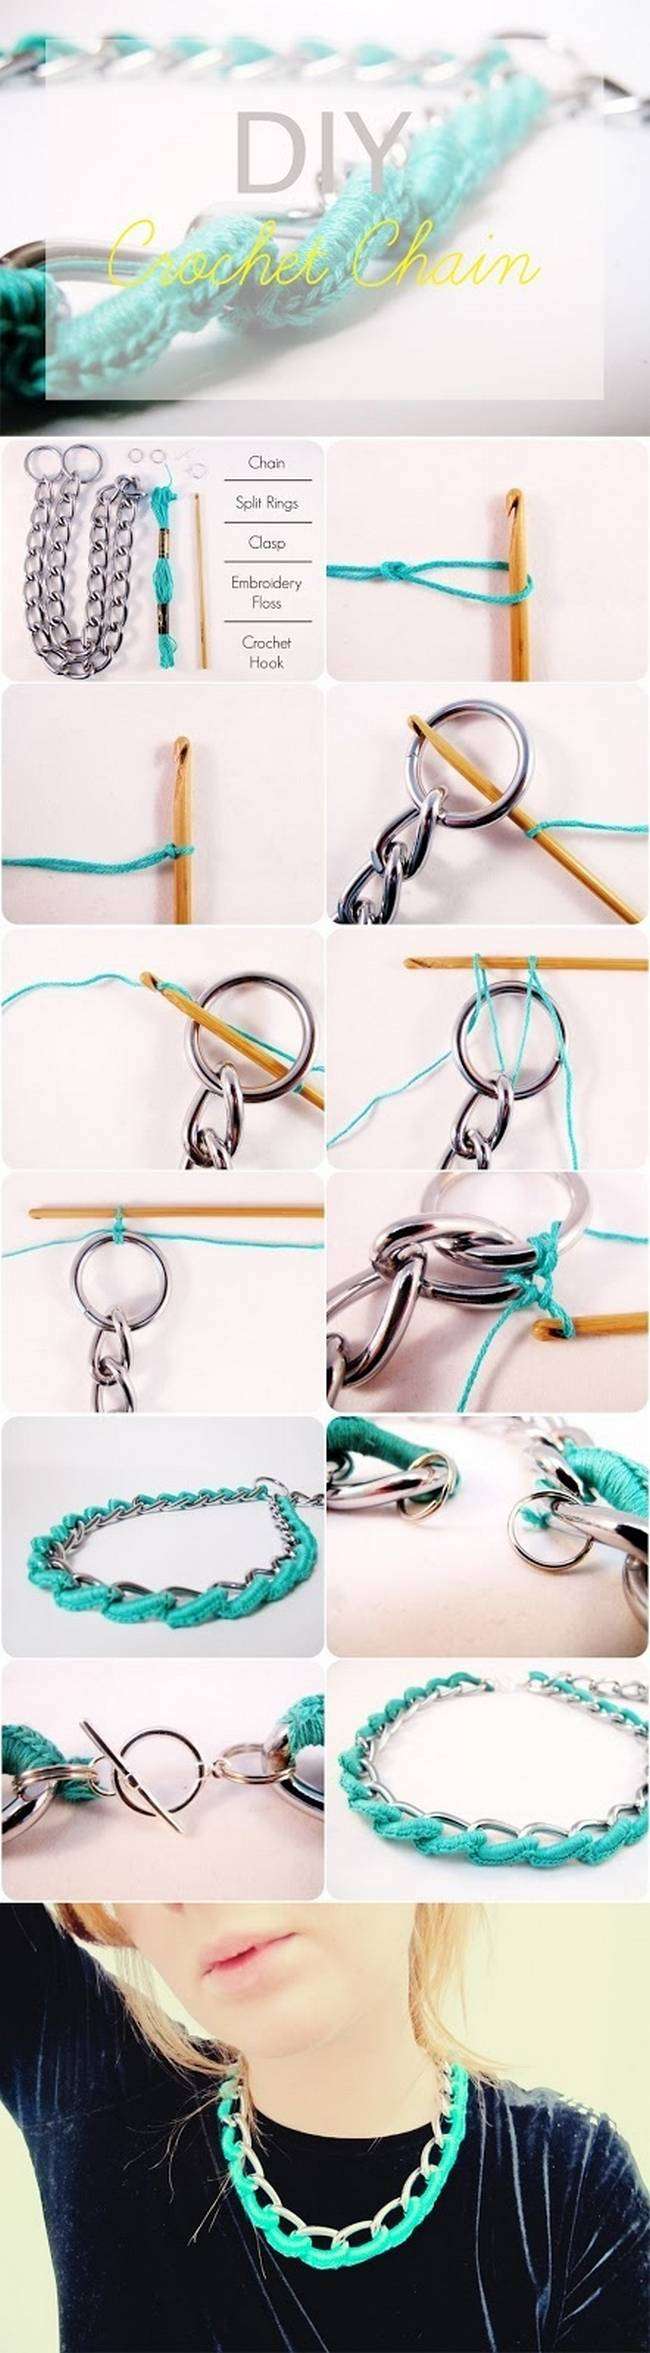
Beautiful crochet + metal chain necklace
Wrapping yarn or thread around a metal chain is a technique that looks complicated but is really just crocheting along a spine. The chain gives it structure; the yarn gives it color and softness.
Materials:
- Metal chain of your desired length and style
- Crochet thread or yarn in a complementary color
- Crochet hook (appropriate for your thread/yarn)
- Scissors
- Jewelry findings (jump rings and a clasp)
- Pliers
Steps:
- Measure and cut your chain to length.
- Attach a jump ring to one end and the clasp to the other — that’s your closure.
- Make a slipknot on your hook, then work your yarn onto the chain. You’ll be making chain stitches around the links: yarn over, pull through the link, then yarn over and pull through the loop on your hook. That pull-through-both-loops at the end is a chain stitch — not a slip stitch, which is a different, shorter move. Keep making chain stitches across the links until the band is as wide as you want.
- Then work your pattern — single crochet, double crochet, whatever you like — either wrapped around the chain or stitched into the gaps between links.
- Continue until it’s the length you want.
- To finish, cut the yarn leaving a tail, pull the tail through the last loop to lock it, then weave the end into the back with a blunt needle so it disappears.
- Secure the crocheted end to the chain with a jump ring, trim any loose ends, and you’re done.
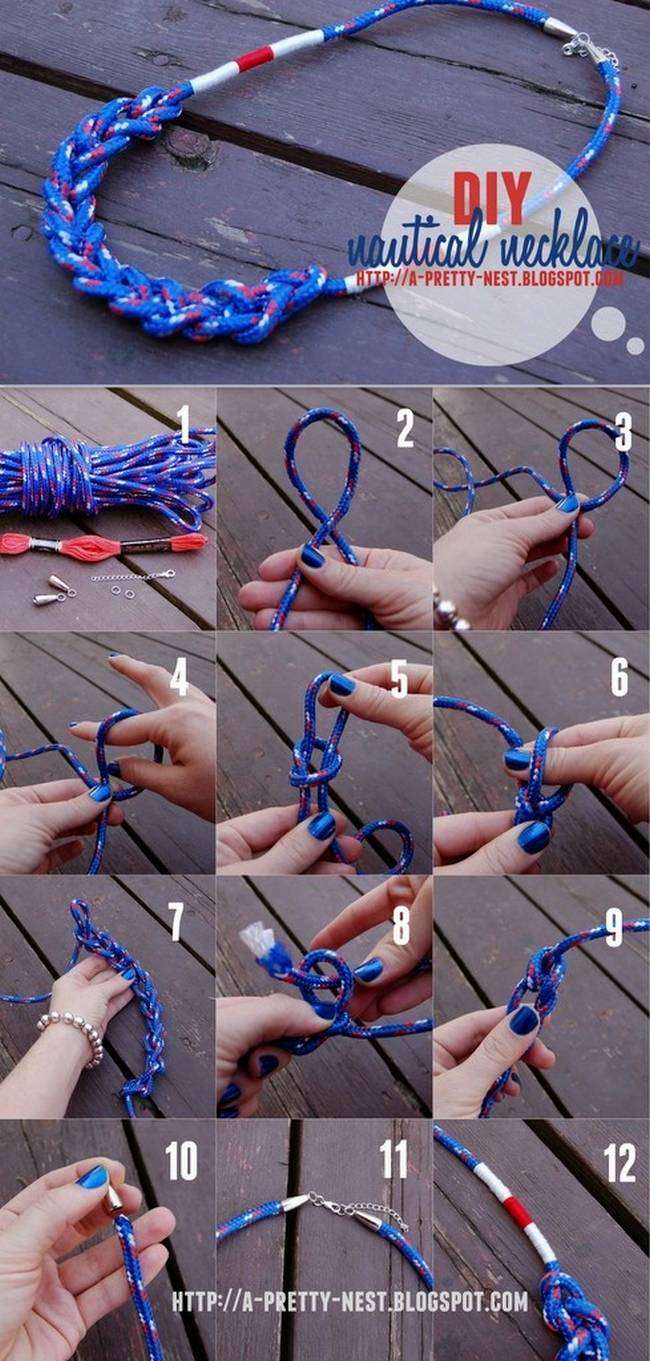
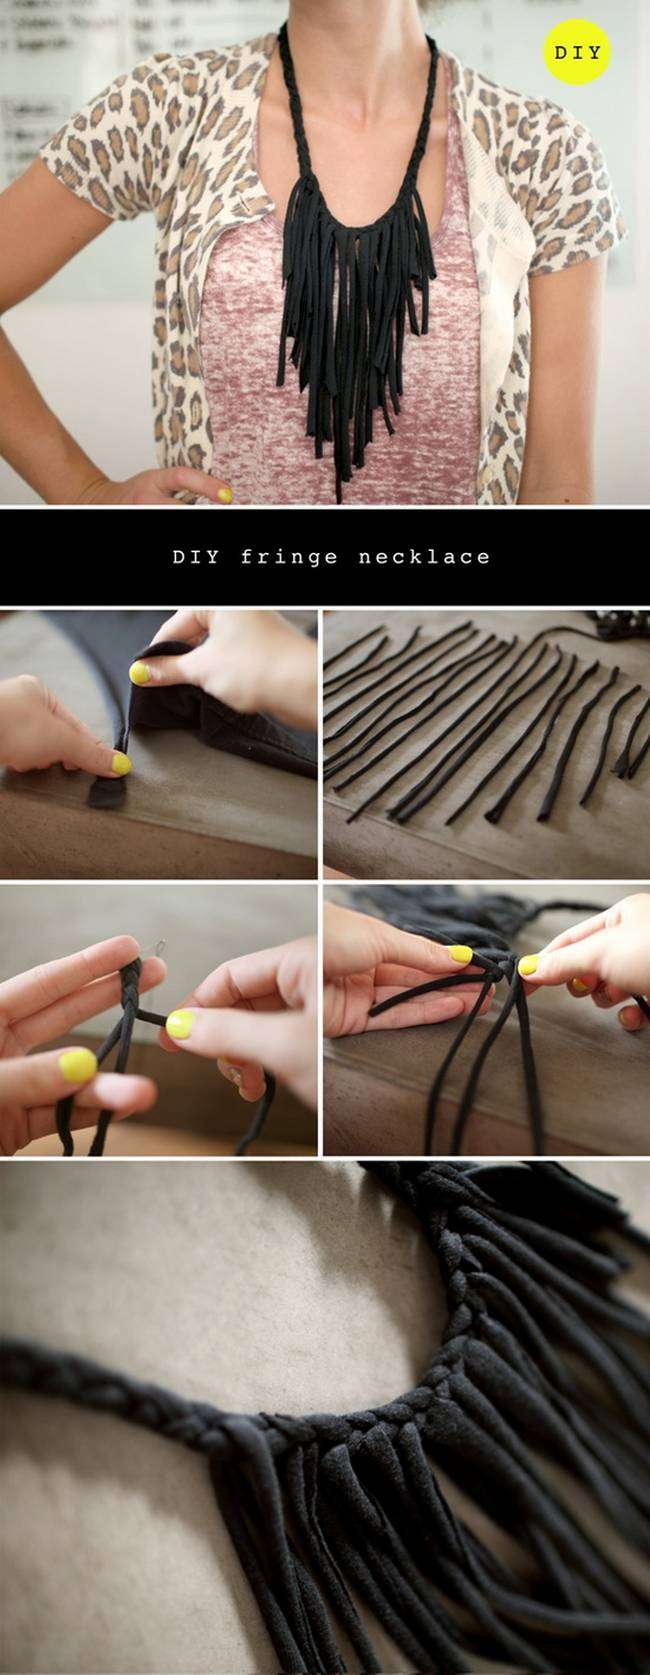
Knit necklace in suede
Knitting with suede cord or “lace” yarn gives you a chunky, textured piece that looks far more expensive than it is. The cord is thick, so you’ll use big needles and the result is bold — a statement collar, not something delicate.
Materials:
- Suede cord or strips
- Knitting needles
- Scissors
- Tapestry needle
- Beads or charms (optional)
Steps:
- Decide the length and cut your suede cord — but cut it long. Knitting uses a lot of yarn, so give yourself plenty rather than measuring the finished necklace.
- Cast on stitches onto your needles with the cord. The number depends on how thick the cord is and how wide you want the piece.
- Knit in the plain knit stitch (yarn over the needle, catch it and pull through, slip the old loop off) until the band is as wide as you want.
- Bind off the stitches, cut the cord leaving a tail to weave in later.
- Optional: thread beads or charms onto the cord before you bind off, at intervals or in a pattern.
- Weave in the loose ends with a blunt tapestry needle.
- Tie the two ends together to form a loop you slip over your head, or add a clasp if you prefer a closure.
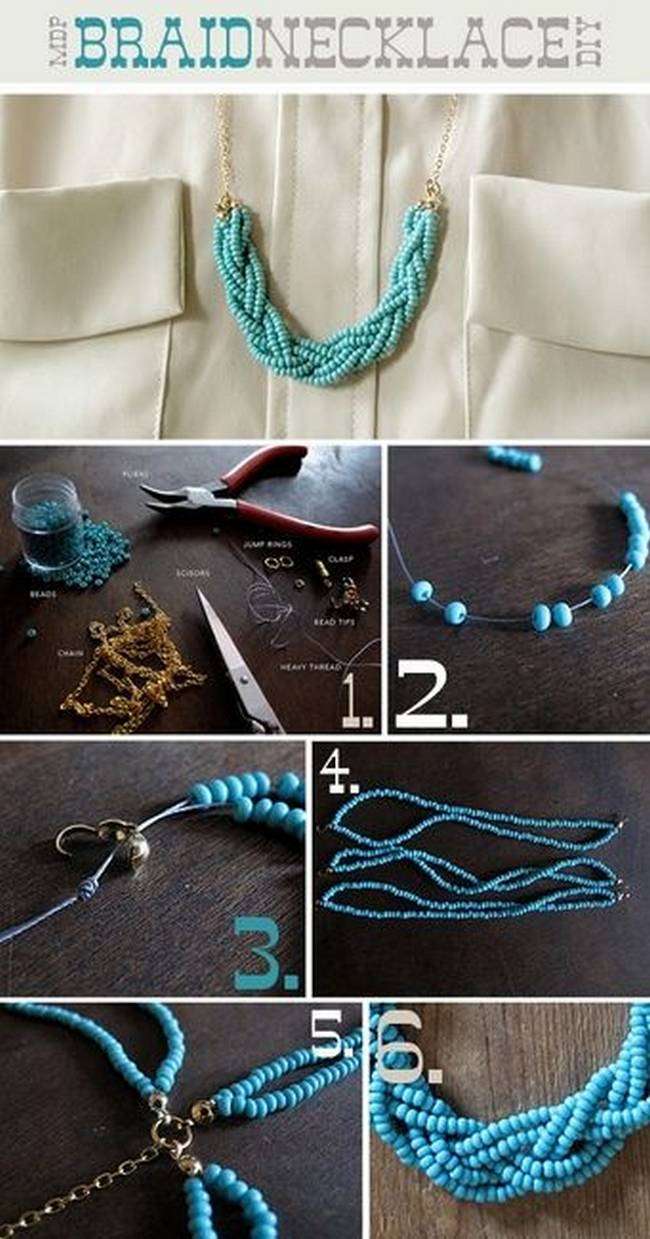
DIY beaded necklace
Beaded necklaces are the perfect first project — there’s almost nothing to go wrong, and you can change the whole look just by swapping beads. One detail trips people up: the way you finish depends on whether you use string or wire.
Materials:
- Beads (glass, plastic, wood, or stone)
- Necklace string or beading wire
- Clasp or jump rings
- Beading needle
- Scissors
- Pliers (optional, for clasps)
Steps:
- Cut your string or wire a few inches longer than the necklace you want — you’ll need extra to finish the ends.
- Thread a beading needle (or just the ends, if you’re using wire with a needle-eye).
- String your beads in whatever pattern you like — alternating colors, a gradient, or pure chaos.
- Continue until it’s the length you want, leaving a few inches of empty string at each end to work with.
- Tie a firm knot at each end to hold the beads.
- Finish the ends — and this is the part that matters:
- If you’re using string or thread, tie a knot, add a drop of fabric or jewelry glue if you have it (it stops knots loosening over time), then attach the clasp with another knot. Knots are what hold string.
- If you’re using beading wire, you can’t knot it well — it’s too slick. Instead, thread a tiny crimp bead onto the wire, loop the wire back through it, squeeze the crimp flat with pliers, then attach the clasp. The crimp bead is what grips the wire.
- Trim the excess, give the knots a tug, and you’re done.
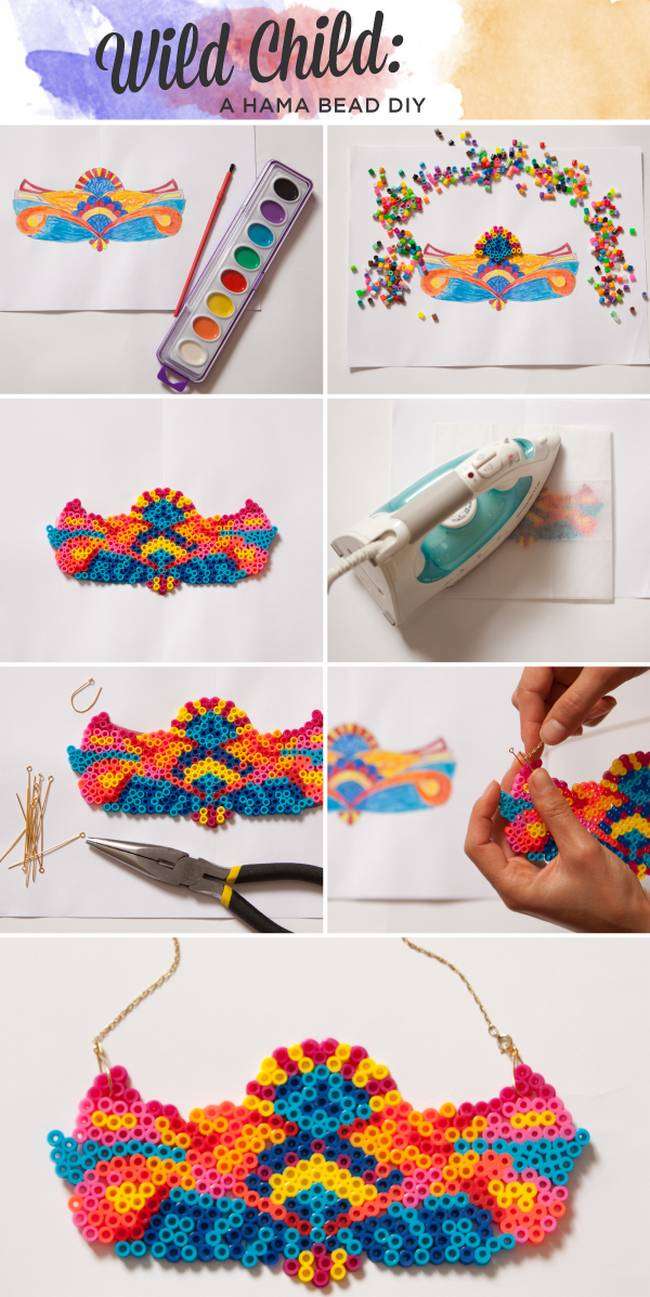
Another handmade beaded necklace
DIY gold necklace with precious stones
Setting real stones sounds intimidating, but at the DIY level you’re mostly doing tiny wire-wrapping jobs — bending small loops and prongs to hold a stone in place. It takes patience, and the last note is worth reading.
Materials:
- Gold chain or gold wire
- Precious stones (small diamonds, gemstones, etc.)
- Jewelry findings (jump rings, clasps)
- Jewelry pliers (round nose, chain nose, and flat nose)
- Wire cutters
- Jewelry adhesive (optional)
Steps:
- Design and plan. Sketch the look or just decide the length and how many stones you want.
- Cut the chain or wire. If you’re starting from scratch, measure and cut the desired length. Skip this if using a pre-made chain.
- Attach the clasp. To a chain, just loop it on both ends. To a wire, bend a small loop at each end with round-nose pliers and attach the clasp to those loops.
- Prepare the stones. Clean them and check any pre-existing settings — if a stone already has prongs, make sure they’re straight and tight before you start.
- Create the settings. With round-nose or flat-nose pliers, bend tiny loops or prongs to cradle each stone. If wire-wrapping feels like too much, buy pre-made settings and just attach those.
- Set the stones. Gently lower each stone into its loop or prongs and close them just enough to hold it. Don’t squeeze hard — too much pressure can chip a stone.
- Finishing touches. Inspect everything and tighten any loose connections.
- Optional: a tiny dot of jewelry glue on each setting adds security for a piece you’ll wear daily.
Working with small diamonds or real gemstones takes a steady hand and good light. If it feels beyond you, take a beginner jewelry class or ask a jeweler — some things are worth paying someone to do well.

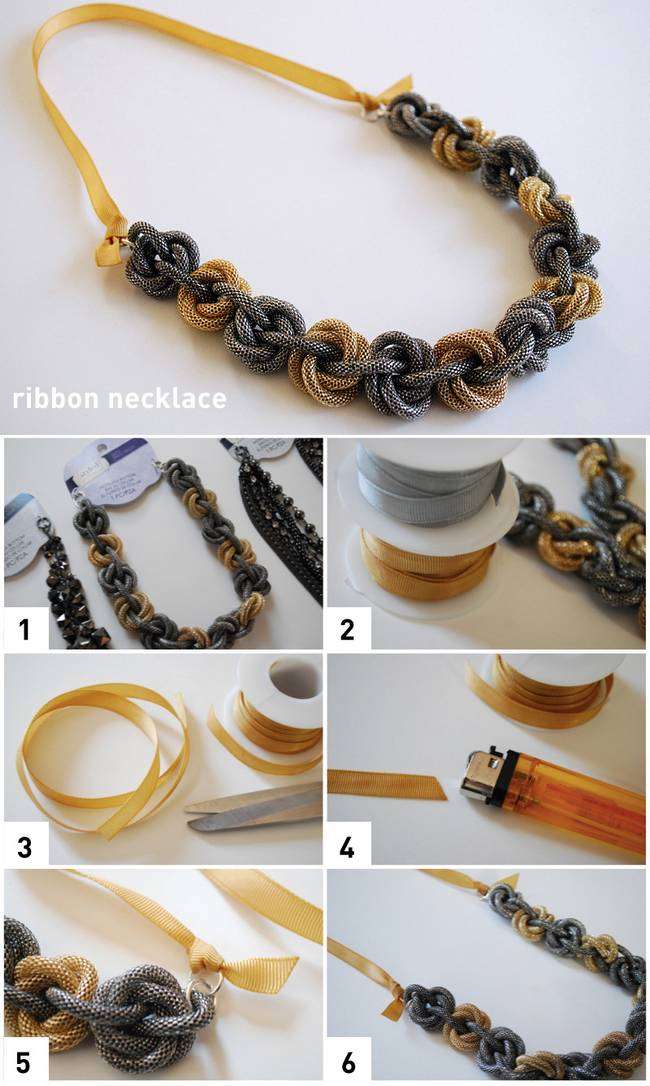
Handmade ribbon necklace
A ribbon necklace is quick, soft, and easy to take apart if you mess up — perfect for experimenting. You’re basically making a decorative cord, and the finish is what makes it look finished rather than craft-class.
Materials:
- A length of ribbon (satin or silk works well)
- Jewelry wire or string
- Jewelry findings (jump rings, clasps, and crimp beads)
- Beads or charms (optional)
- Jewelry pliers
- Scissors
Steps:
- Measure and cut your ribbon to length, adding a few inches to tie or attach a closure.
- Make a small hem or loop at each end — fold the end over a little and stitch it, or punch a tiny hole — so you have something solid to attach the hardware to. You can’t just clamp a jump ring onto bare ribbon; it’ll pull through.
- If you want beads or charms, slide them on now, before you close the ends.
- Attach a jump ring or clasp to each end and close it. Now you can tie it like a choker or fasten the clasp.
- Want something stiffer and more structured? Swap the ribbon for jewelry wire: thread your beads, then use pliers to bend the wire into the shape you want, finishing with jump rings or clasps at each end.
- For a clean finish on a wire version, use crimp beads to secure the ends — crimps grip metal wire, not fabric, so save them for the wire, not the ribbon.
- Trim any excess and you’re done. Mix ribbons, colors, and beads to make each one different.