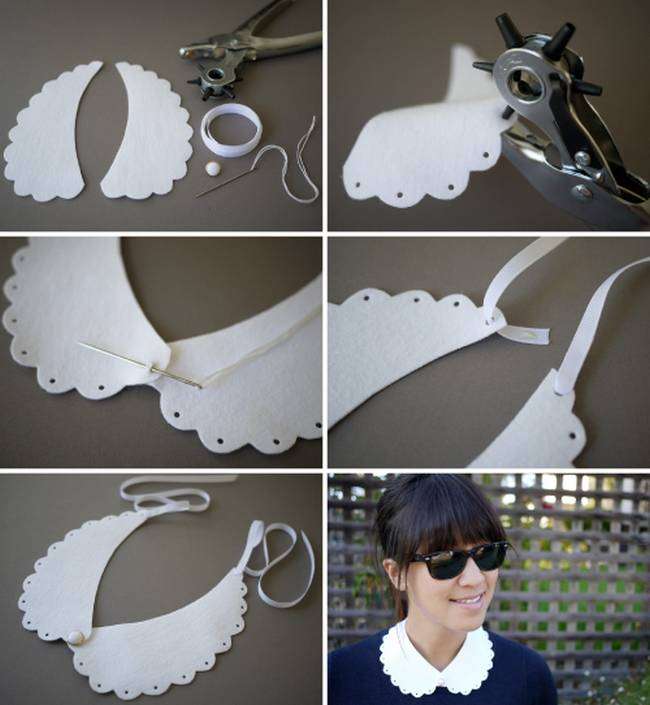
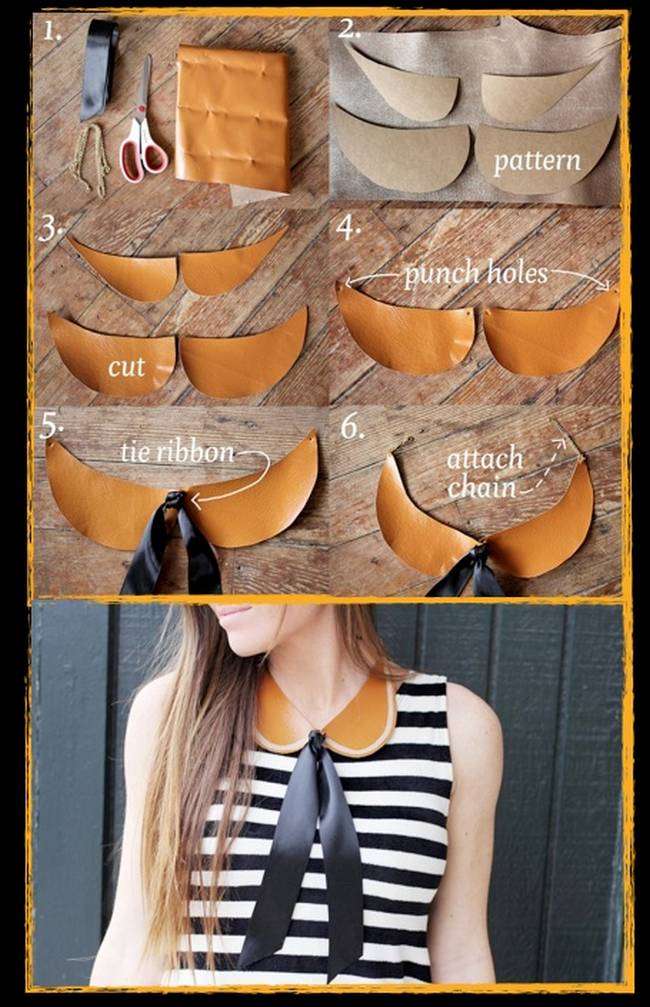
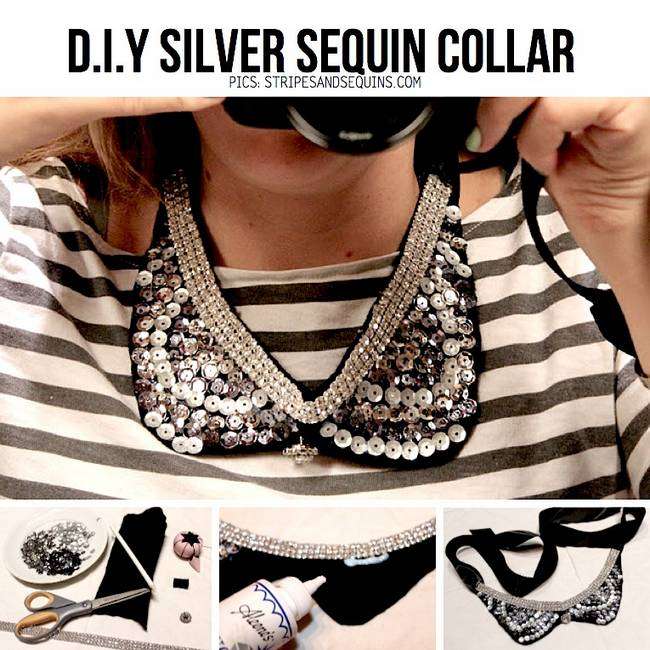
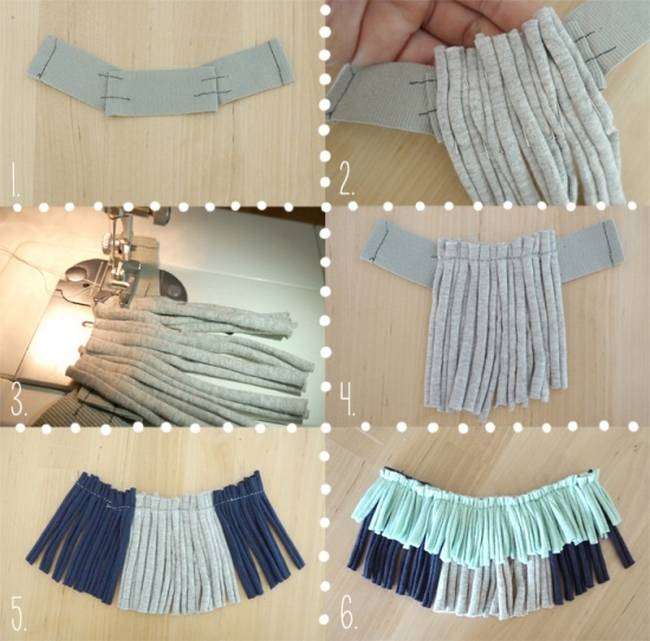
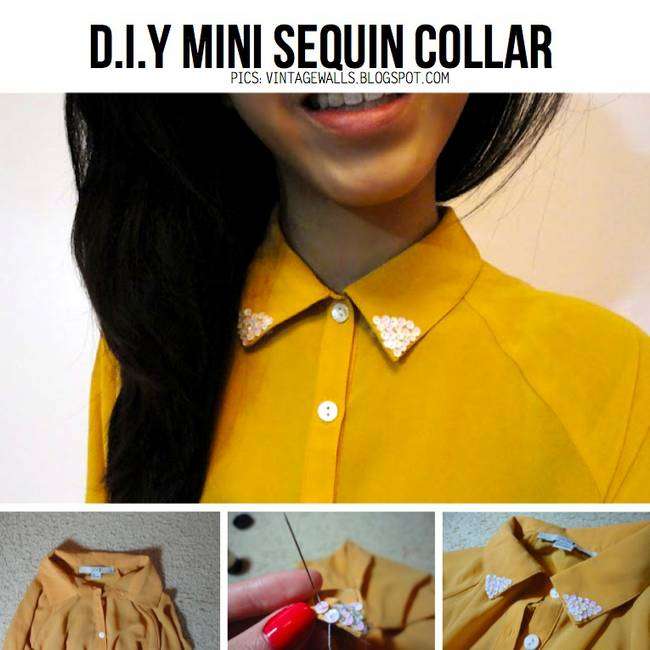
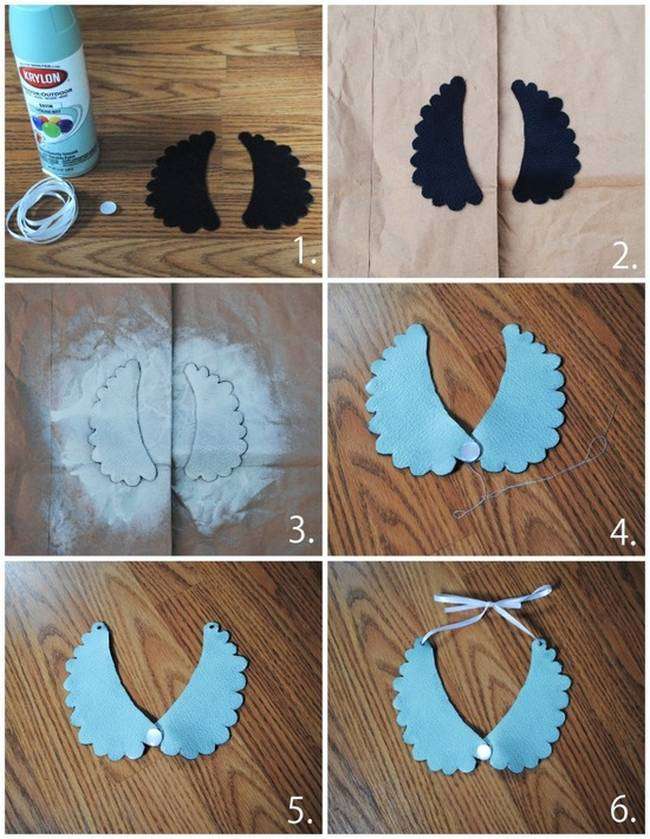
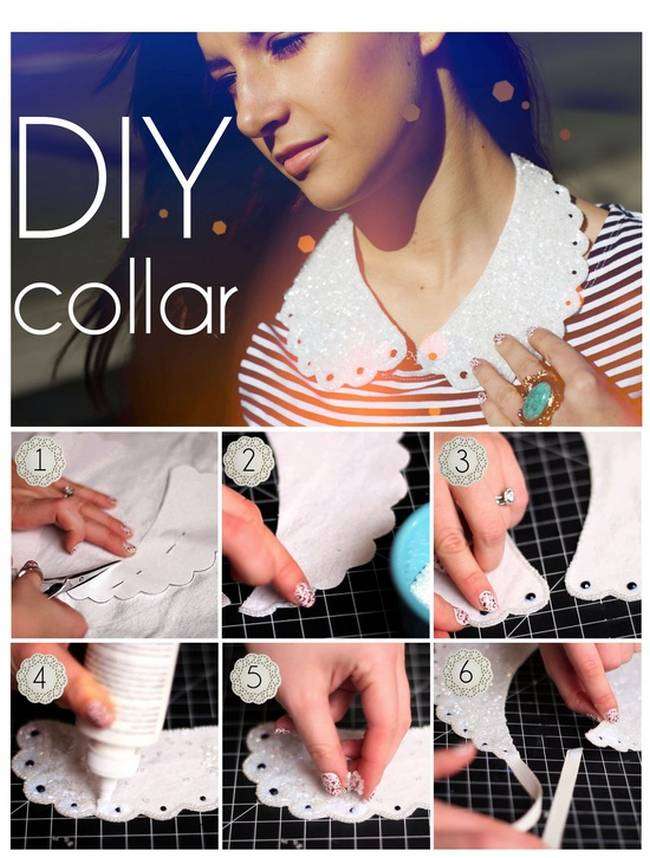
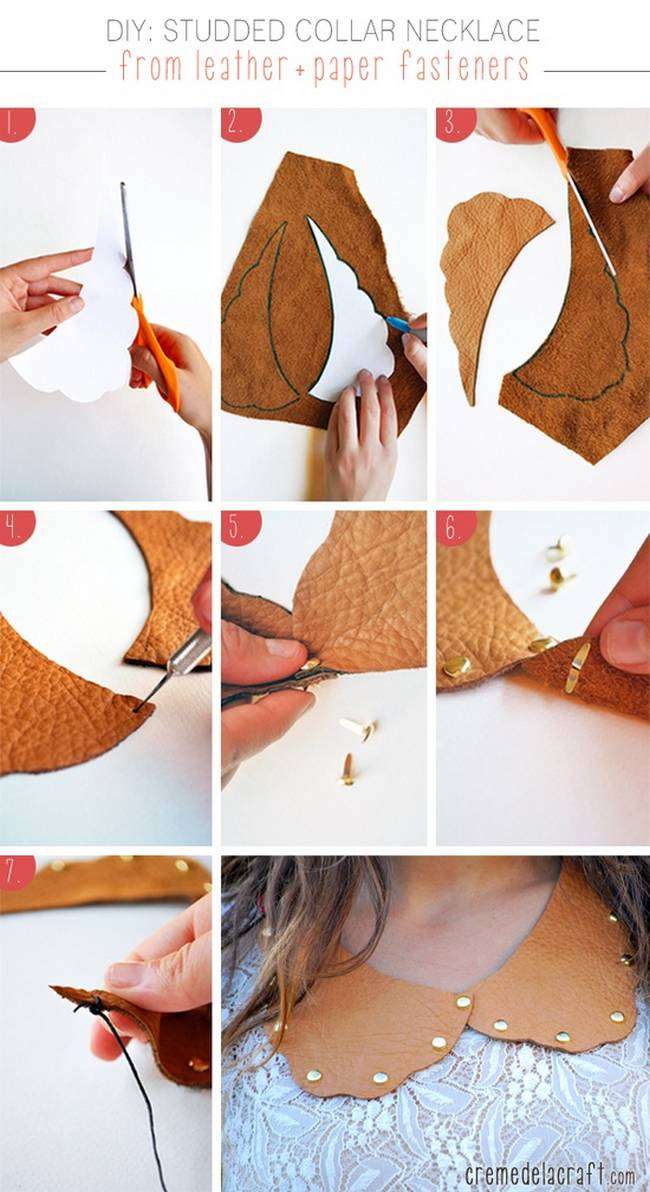
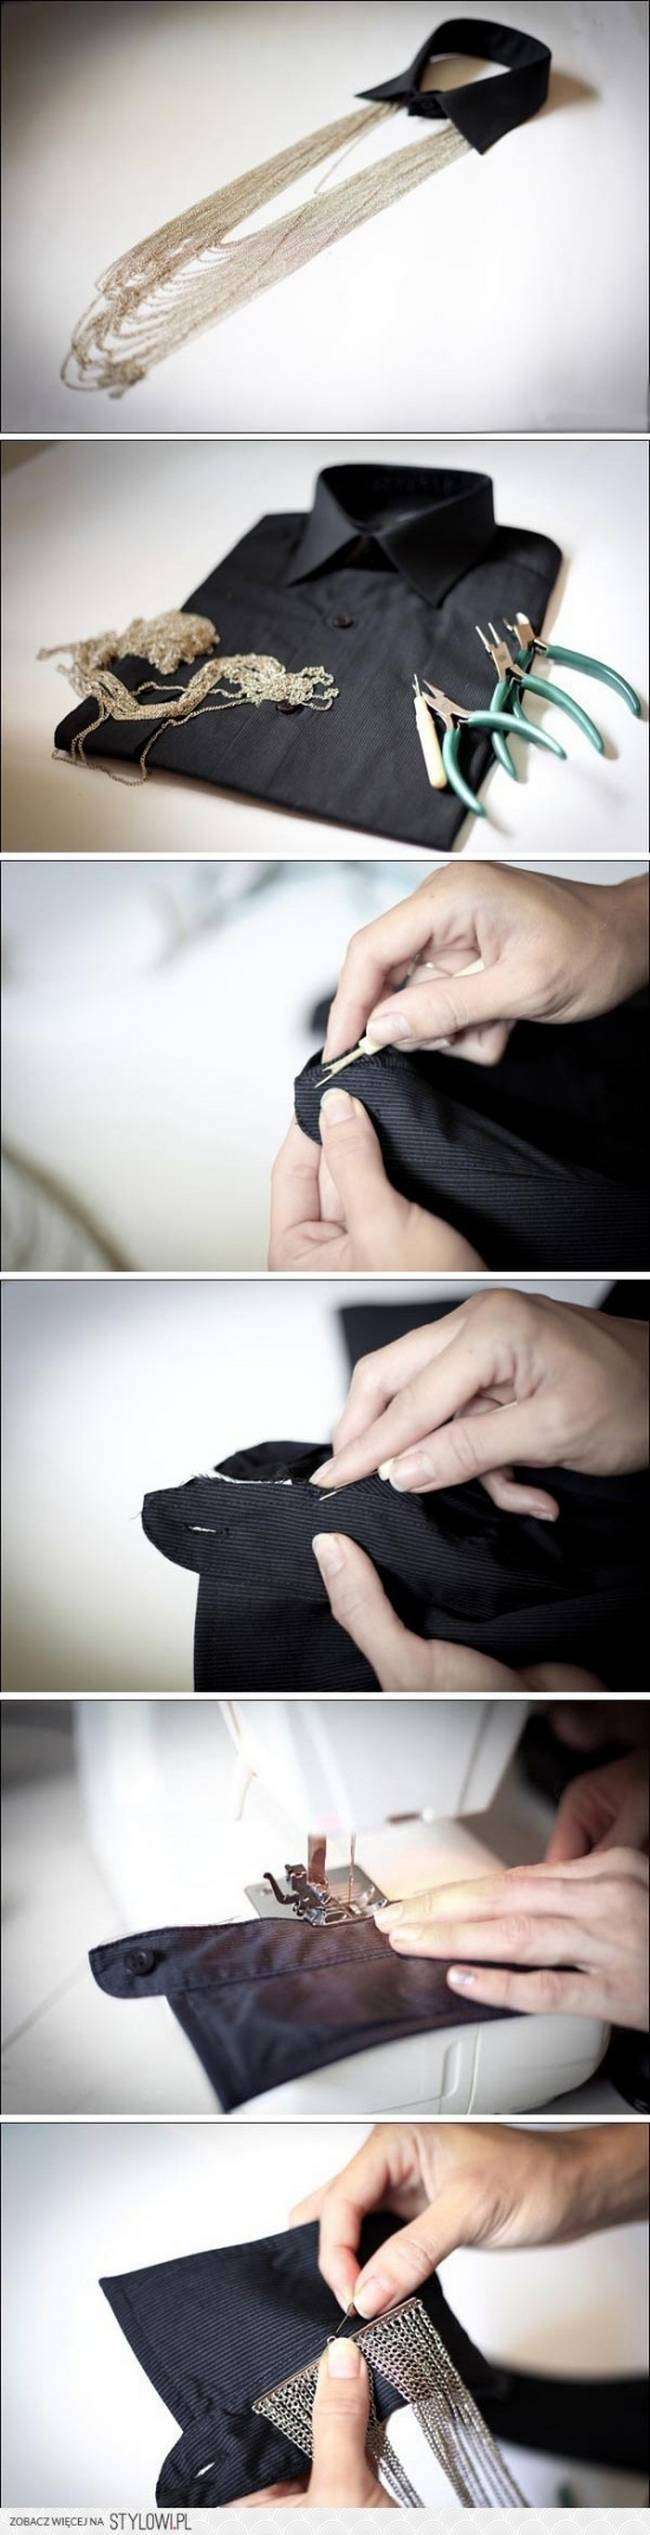
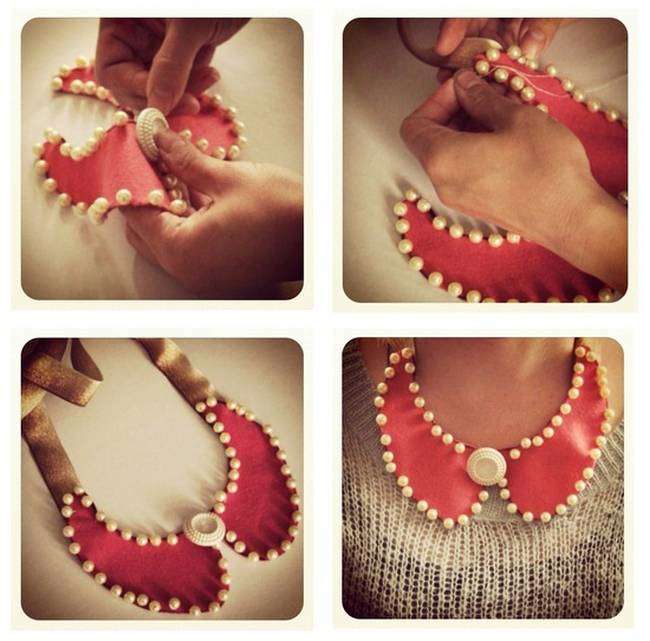
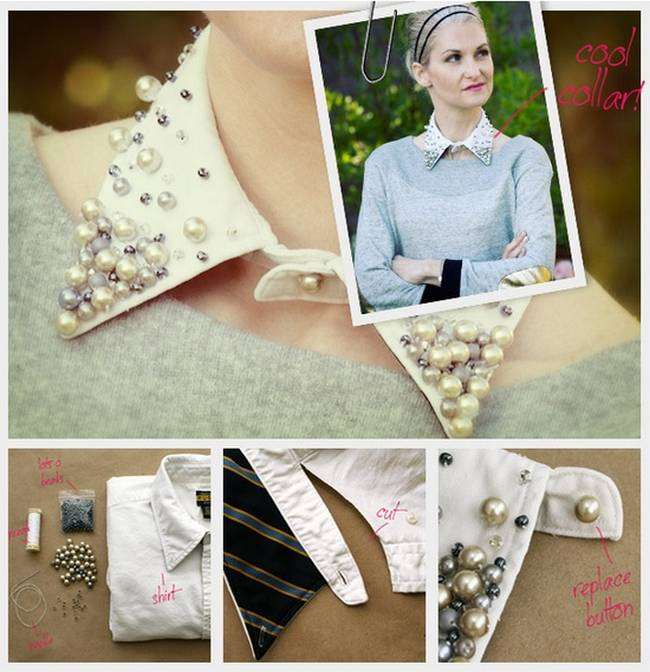
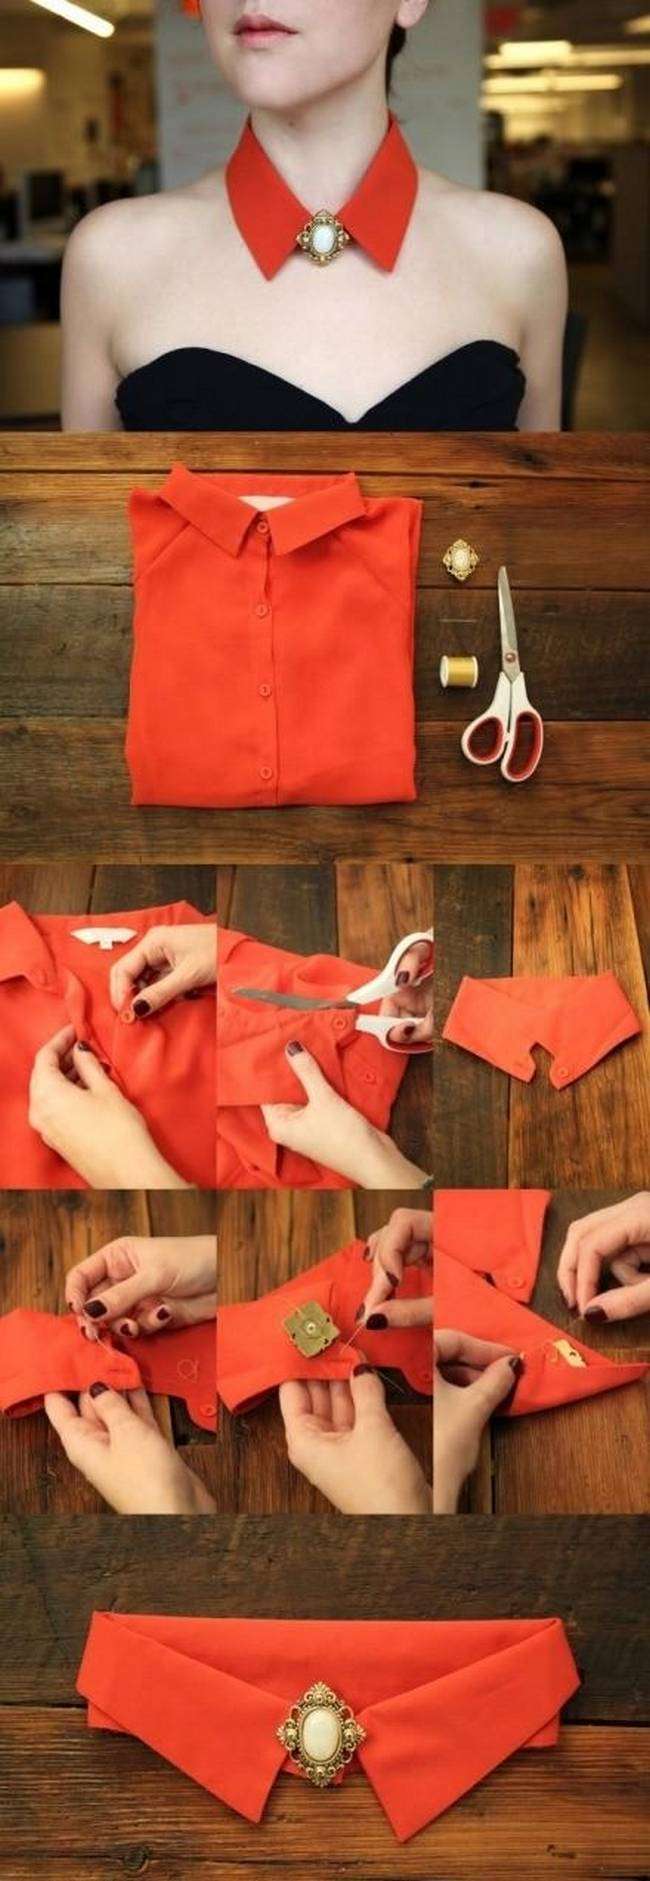
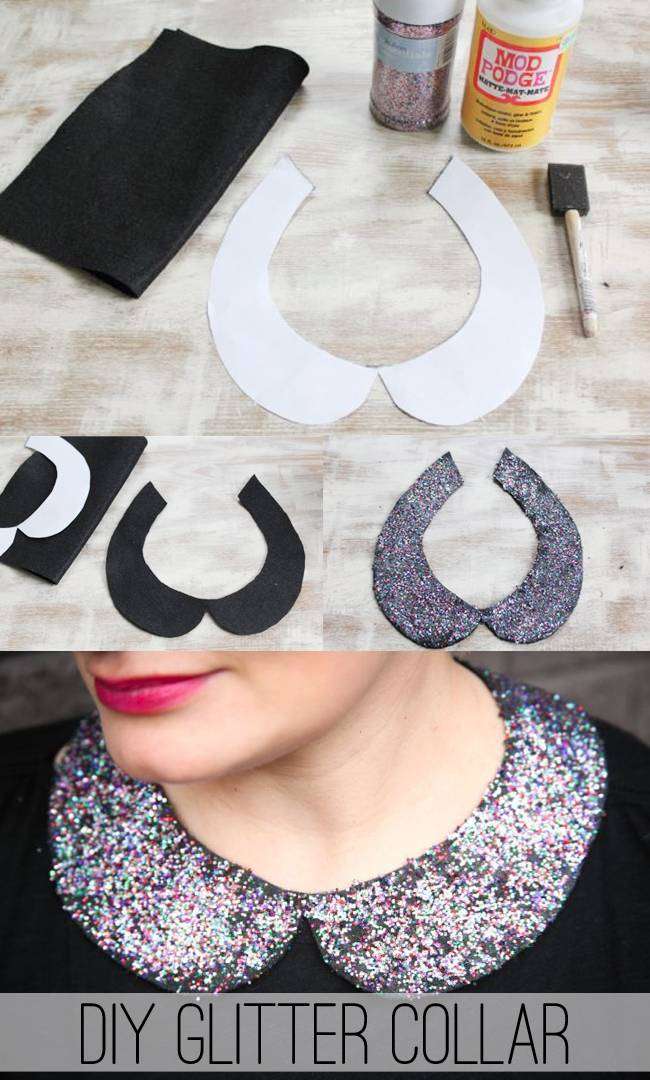
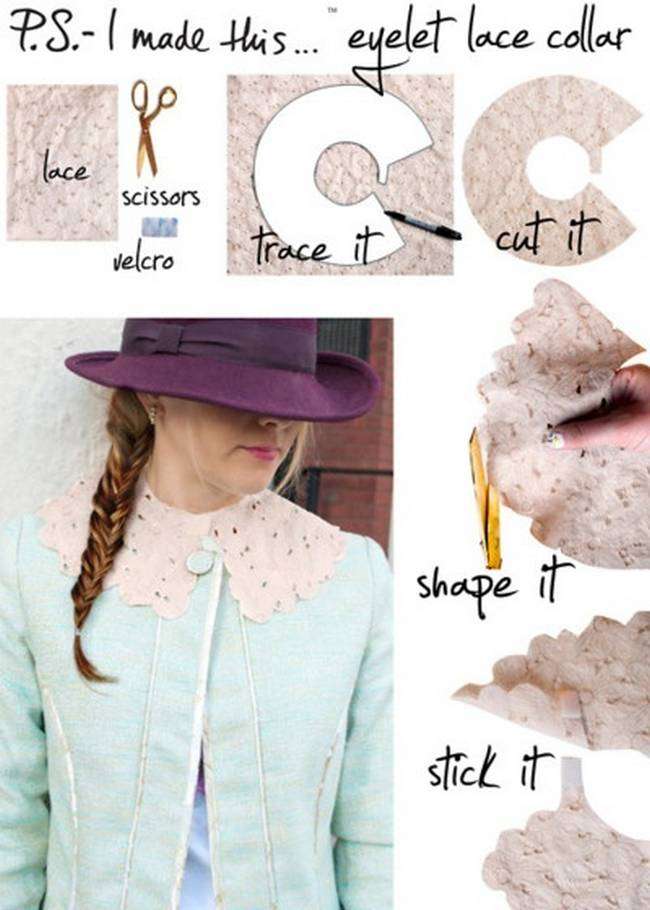
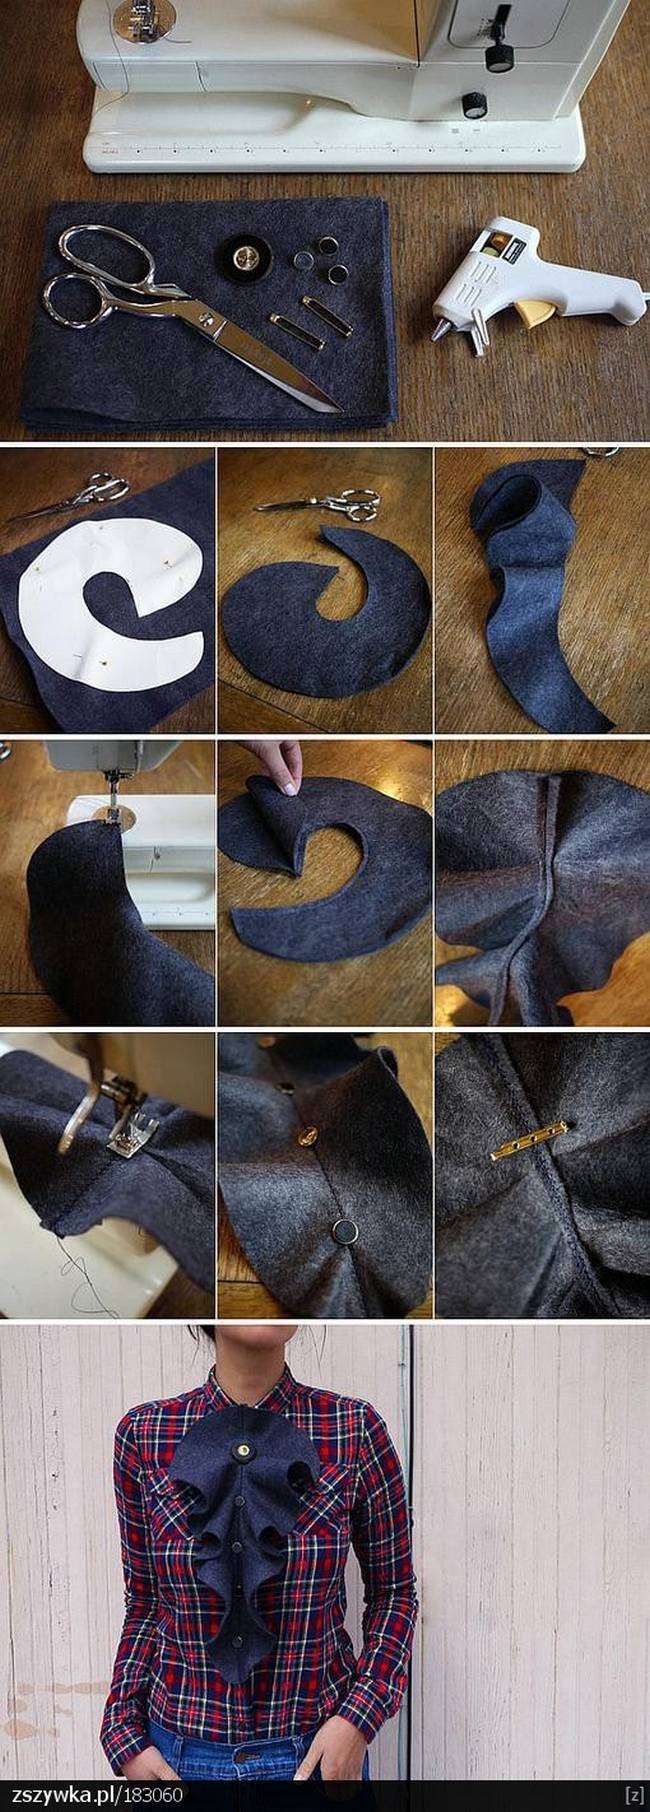
It all started with Miu Miu (or our grandmothers, depending on who you ask), but detachable collars have really dominated the neck game for the past few seasons. Maybe it’s the crisp lines or the sheer versatility, but there is nothing quite like a bit of buttoned-up bling at your neck to dress up an outfit. However, shelling out the cash for a designer version can be daunting. That’s why we have put our crafty skills to the test and created four DIY collars that anyone can make, as long as you have a spare moment. Click through for these incredibly clever how-to’s and whip up the whole set.
Tips for DIY Collar-making
Choose the right fabric: Select a fabric that is durable and comfortable, such as cotton, linen, or denim. Avoid using flimsy materials or those that might irritate the skin.
Measure accurately: Take precise measurements of the neck circumference to ensure a perfect fit. Use a tape measure and make sure it is snug but not too tight.
Cut the pattern: Use a collar pattern or create one on your own. Cut the fabric according to the pattern, making sure to leave seam allowances.
Sew the collar pieces together: Pin the collar pieces together, right sides facing each other. Use a sewing machine or hand stitch along the edges, leaving a small opening for turning. Trim any excess fabric or threads before turning it right side out.
Press and iron: After turning the collar right side out, gently press the seams with an iron to give it a crisp look.
Attach the collar to the garment: Pin the collar to the neckline of the garment, aligning the center back of the collar with the center back of the garment. Sew along the neckline, ensuring the collar is securely attached.
Topstitch for a finished look: For added durability and a professional finish, topstitch around the collar, about 1/8 inch from the edge. This will also help keep the collar in place.
Style and finish: Depending on the desired style, you can add additional details to the collar, such as topstitching, decorative buttons, or trim. Experiment with different techniques and designs to make your collar unique.
Test the fit: Before finalizing the collar, try the garment on to ensure the collar sits comfortably around the neck. Make any necessary adjustments before securing the collar permanently.
Practice and experiment: Making collars can be a bit tricky, especially if you’re new to sewing. Don’t be discouraged if your first attempt isn’t perfect – practice, learn from your mistakes, and experiment with different techniques and styles.


Text by: By Connie Wang, Lisa Eppich