Eyeliner is the most dramatic thing you can do with a tiny stick of pigment, and it’s almost entirely about one idea: whether your eye reads as open or closed.
A line sitting right on the lash line mimics the shadow of your lashes — it makes them look denser and the eye look smaller, more closed, more mysterious. A wing lifted up and out past the outer corner does the opposite: it mimics the upward tilt that reads as alert, awake, lifted. Everything else — color, graphics, a line floating above the lid — is just variation on that one question of where the eye “ends.” Learn that, and you can make the same eyes look sleepy or wide-awake, old-fashioned or wild, with the same two tools.
This is the whole trick. The rest is practice, and a little courage.
First, pick your weapon
The formula changes everything about how the liner behaves, so choose it for the look, not just what’s sitting in your bag.
- Liquid (brush or felt tip): the most pigmented and the sharpest. Best for a crisp wing and for graphic lines. It sets fast, which is great if your hand is steady and brutal if it isn’t.
- Gel (pot + brush): flexible and a touch more forgiving than liquid, still holds a sharp wing and blends a little. This is the favorite of a lot of professional artists for a reason.
- Pencil: soft and smudgeable, the easiest for beginners and the only real choice for a smoky look. Perfect for the waterline and tightlining. Overdone in black on a wide-open eye it can read soft and a little tired, so keep it controlled.
- Liner pen / felt tip: precise and easy to grip, ideal for thin lines and graphic detail.
Rule of thumb: sharp wing or graphic = liquid or gel. Soft, smoky, beginner-friendly = pencil. Fine detail = pen or a gel with a thin brush.
Prep and the grip (this matters more than you’d think)
Most bad eyeliner isn’t a skill problem, it’s a setup problem.
- Use a mirror at eye level. Not a ceiling mirror you look up into — that flips the angle of everything and your wing will come out crooked without you knowing.
- Anchor your hand. Rest the pinky and ring finger against your cheek so your hand moves with your face instead of hovering over it. A steady hand is an anchored hand.
- Don’t pull the lid taut and hold it. That stretches the skin; the moment you let go the line looks wrong. Just rest a finger there for stability.
- Look slightly down. So the lid itself shows you to work on.
- Shaky hands? Draw the line in short dashes and connect them, or do it with the eye half-closed, resting the lash line on the edge of the mirror.
The styles
Classic straight line
The foundation of everything. A thin line right at the lash line just mimics denser lashes, so it’s the most natural liner there is and the one to nail first.
Start thin at the inner corner and keep it roughly even across the lid, letting the line simply end where your outer lashes end. Don’t drag it past the eye or droop it downward — that weighs the look down. If you want a hint of lift, just let the very end hover a hair above the lash line; you don’t need a wing to do it.
The cat-eye (winged liner)
This is the look people mean when they say “I can’t do eyeliner,” and it’s only hard because nobody explains the geometry.
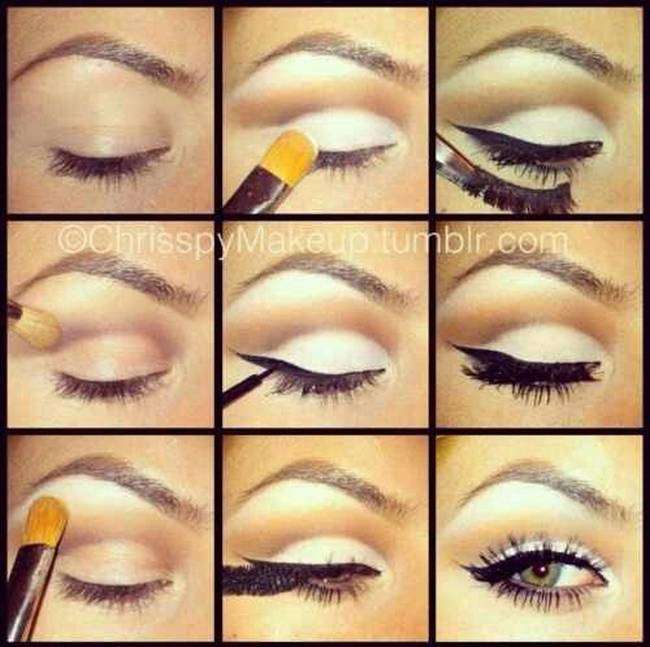
The wing works because lifting a line up and out past the outer corner mimics that alert, upward tilt. Here’s the trick for the angle: imagine a line running from your outer brow down past the outer corner of your eye — the wing should sit on the extension of that line. Put a small dot there first as a target, then draw the lid’s top line from the inner corner out to that dot, thickening as it goes, then connect the dot back down to your lash line to close the wing.
Once both eyes are done, take a cotton swab dipped in makeup remover — or a small angled brush — and swipe under the wing to sharpen it and wipe away the inevitable wobble. Cleanup is what turns “attempted” into “done.”
Double wing
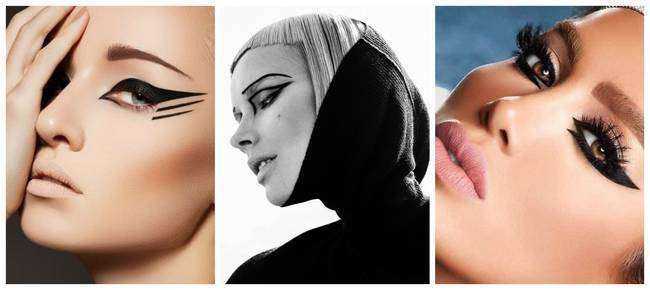
A cat-eye with an extra line above it, parallel and a little higher. It reads as more drama, more fashion, less “everyday glam” — the second line pushes attention up toward the brow.
Do the classic cat-eye first, then draw a second thin line above the first, starting mid-lid and running parallel toward the brow, connecting at the outer corner. Keep the gap between them even; uneven spacing is the only thing that makes it look messy instead of intentional.
Colored eyeliner
The easiest way to feel like you’re doing something when you’re really just doing the classic line — swap the black.
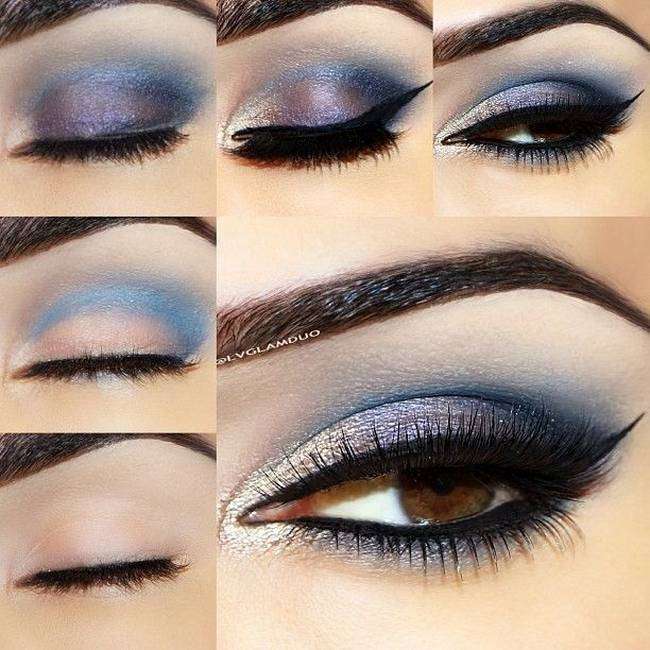
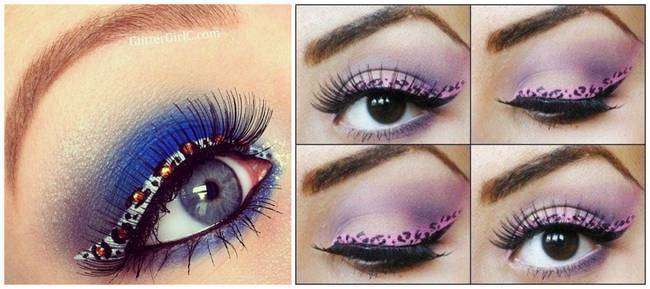
A colored liner on the lash line, or a colored wing, does exactly what black does optically (opens or closes the eye) but reads as play. Blues, greens, purples, even a metallic. Keep the rest of the eye neutral — a little shadow and no heavy color elsewhere — so the liner is the only thing talking. If you want it to really pop, a slightly damp brush on the pigment gives it more intensity.
Graphic eyeliner
This is where the lash line stops being the rule. Shapes, lines, negative space, a single dot off the corner — drawn with liquid or a gel and a fine brush on the bare lid.
Start simple: a thin doubled line, a small flick past the crease, or dots along the upper lid. Work from the outside in so a mistake lands near your edge and is easy to wipe. And keep one eye as your “control” — do that one first, then match the other to it, because freehand symmetry is the hard part.
Blended or smudged eyeliner
The smoky, grungy, “didn’t quite sleep” look. It’s the opposite of the crisp wing — here you want soft, diffused, a little imperfect.
Draw a pencil line along the upper lash line, then immediately blur it with a smudge brush or a cotton swab before it sets. Packing a dark shadow over the top intensifies the smoke. Because this look lives on softness, don’t try to make it even or symmetrical — the point is the smear, not the line.
Floating eyeliner
A line drawn above the crease instead of on the lash line, so the eye seems to have a second, higher edge. Trendy, unconventional, and a bit of a show-off move.
With a liquid or gel, draw one thin line across the lid, parallel to and just above your natural crease, from inner to outer corner, keeping it level with the brow. It looks best when it’s barely there — a hair-thin line. Too thick and it looks like a bruise.
Mistakes that actually happen
- Dark, heavy inner corners. This shrinks the eye. Keep the inner corner thin or skip it entirely; the line can get a bit heavier toward the outer corner.
- Uneven wings. Do each eye the same number of passes, then step back and look straight on — not one eye at a time.
- Pulling the lid. Anchor instead, as above.
- Wrong formula for the look. See “pick your weapon.”
- Applying over a damp lid. Let moisturizer or eye-cream absorb first, or the liner slides and breaks up.
A note for your eye shape
Hooded eyes. The wing can disappear when the eye is open. Place it a little higher, or lean into the double-wing, and set it so it doesn’t transfer onto the hood.
Monolids. Keep the line thin so it actually shows when the eye is open; gel or liquid set with a touch of powder holds best.
Watery eyes. Reach for waterproof — a regular liquid will feather within an hour.
Round eyes. A wing elongates and lifts; a plain round line widens. Choose based on which way you want the eye to go.
One last thing
Eyeliner isn’t about a perfect line. It’s about where you decide the eye ends — a millimeter higher opens the face up, a millimeter lower closes it down. Learn that, get one wing you’re happy with, and everything else is just play.